SHOPLINE's "Edit customer information in Admin" feature lets you edit customer information directly in the Admin to assist customers, such as updating the delivery addresses.
*Please read The setting of Membership Tier to learn how to change the member tiers.
This article will cover the following:
- How to edit customer information
- How to edit customer subscription status
- Permission settings for customer management
1. How to edit customer information
Step 1
In the SHOPLINE Admin, go to [Customer Management] > [Customers] and click the View button.
Step 2
In the "Customer Details" section, click the Edit button to edit the customer's profile.
The editable fields of customer details:
Name |
If the input format is invalid, an error message will be displayed. Please remove any special characters and try again. |
Birthday |
For more details, please refer to Birthday Settings & Notice. |
|
You can modify the email address for a customer, but you cannot fill in the email address of an existing customer. Moreover, the email will be updated after saving without sending email verification even if the "Send Verification Email When Register" feature is opened. The verification status of the email will be "Not verified yet," and no email verification notice will be sent to customers. |
|
Mobile Number |
You can modify the mobile number for a customer, but you cannot fill in the mobile number of an existing customer. The customer's mobile number can be updated directly in the Admin without verification. After the update, the status will display "Not verified yet," and no customer's SMS verification email will be sent to customers. |
Language |
The language of the email will be based on the setting here. |
Delivery Addresses |
You can create five sets of delivery addresses at most. Recipient Name, Recipient Phone Number, Shipping Destination, City, and Address are required. |
External Member ID |
If a third-party membership system is connected, you can enter the customer's external member ID here. |
Step 3
Click the Save button to update the settings.
2. How to edit customer subscription status
In the "Subscription status" section, click Edit to help customers unsubscribe from email, SMS, LINE, Facebook Messenger, and WhatsApp marketing.
How do customers receive store promotions (subscribe to notifications)?
i. Customers can select their preferred subscription channels (email, SMS, WhatsApp, Facebook, LINE) in the member center.
Due to updates in Facebook Policies, the subscription to Facebook notifications
is different from other channels. Please refer to the following steps:
*Note: Other channels ⭢ click "Subscribe" and login to the account to subscribe.
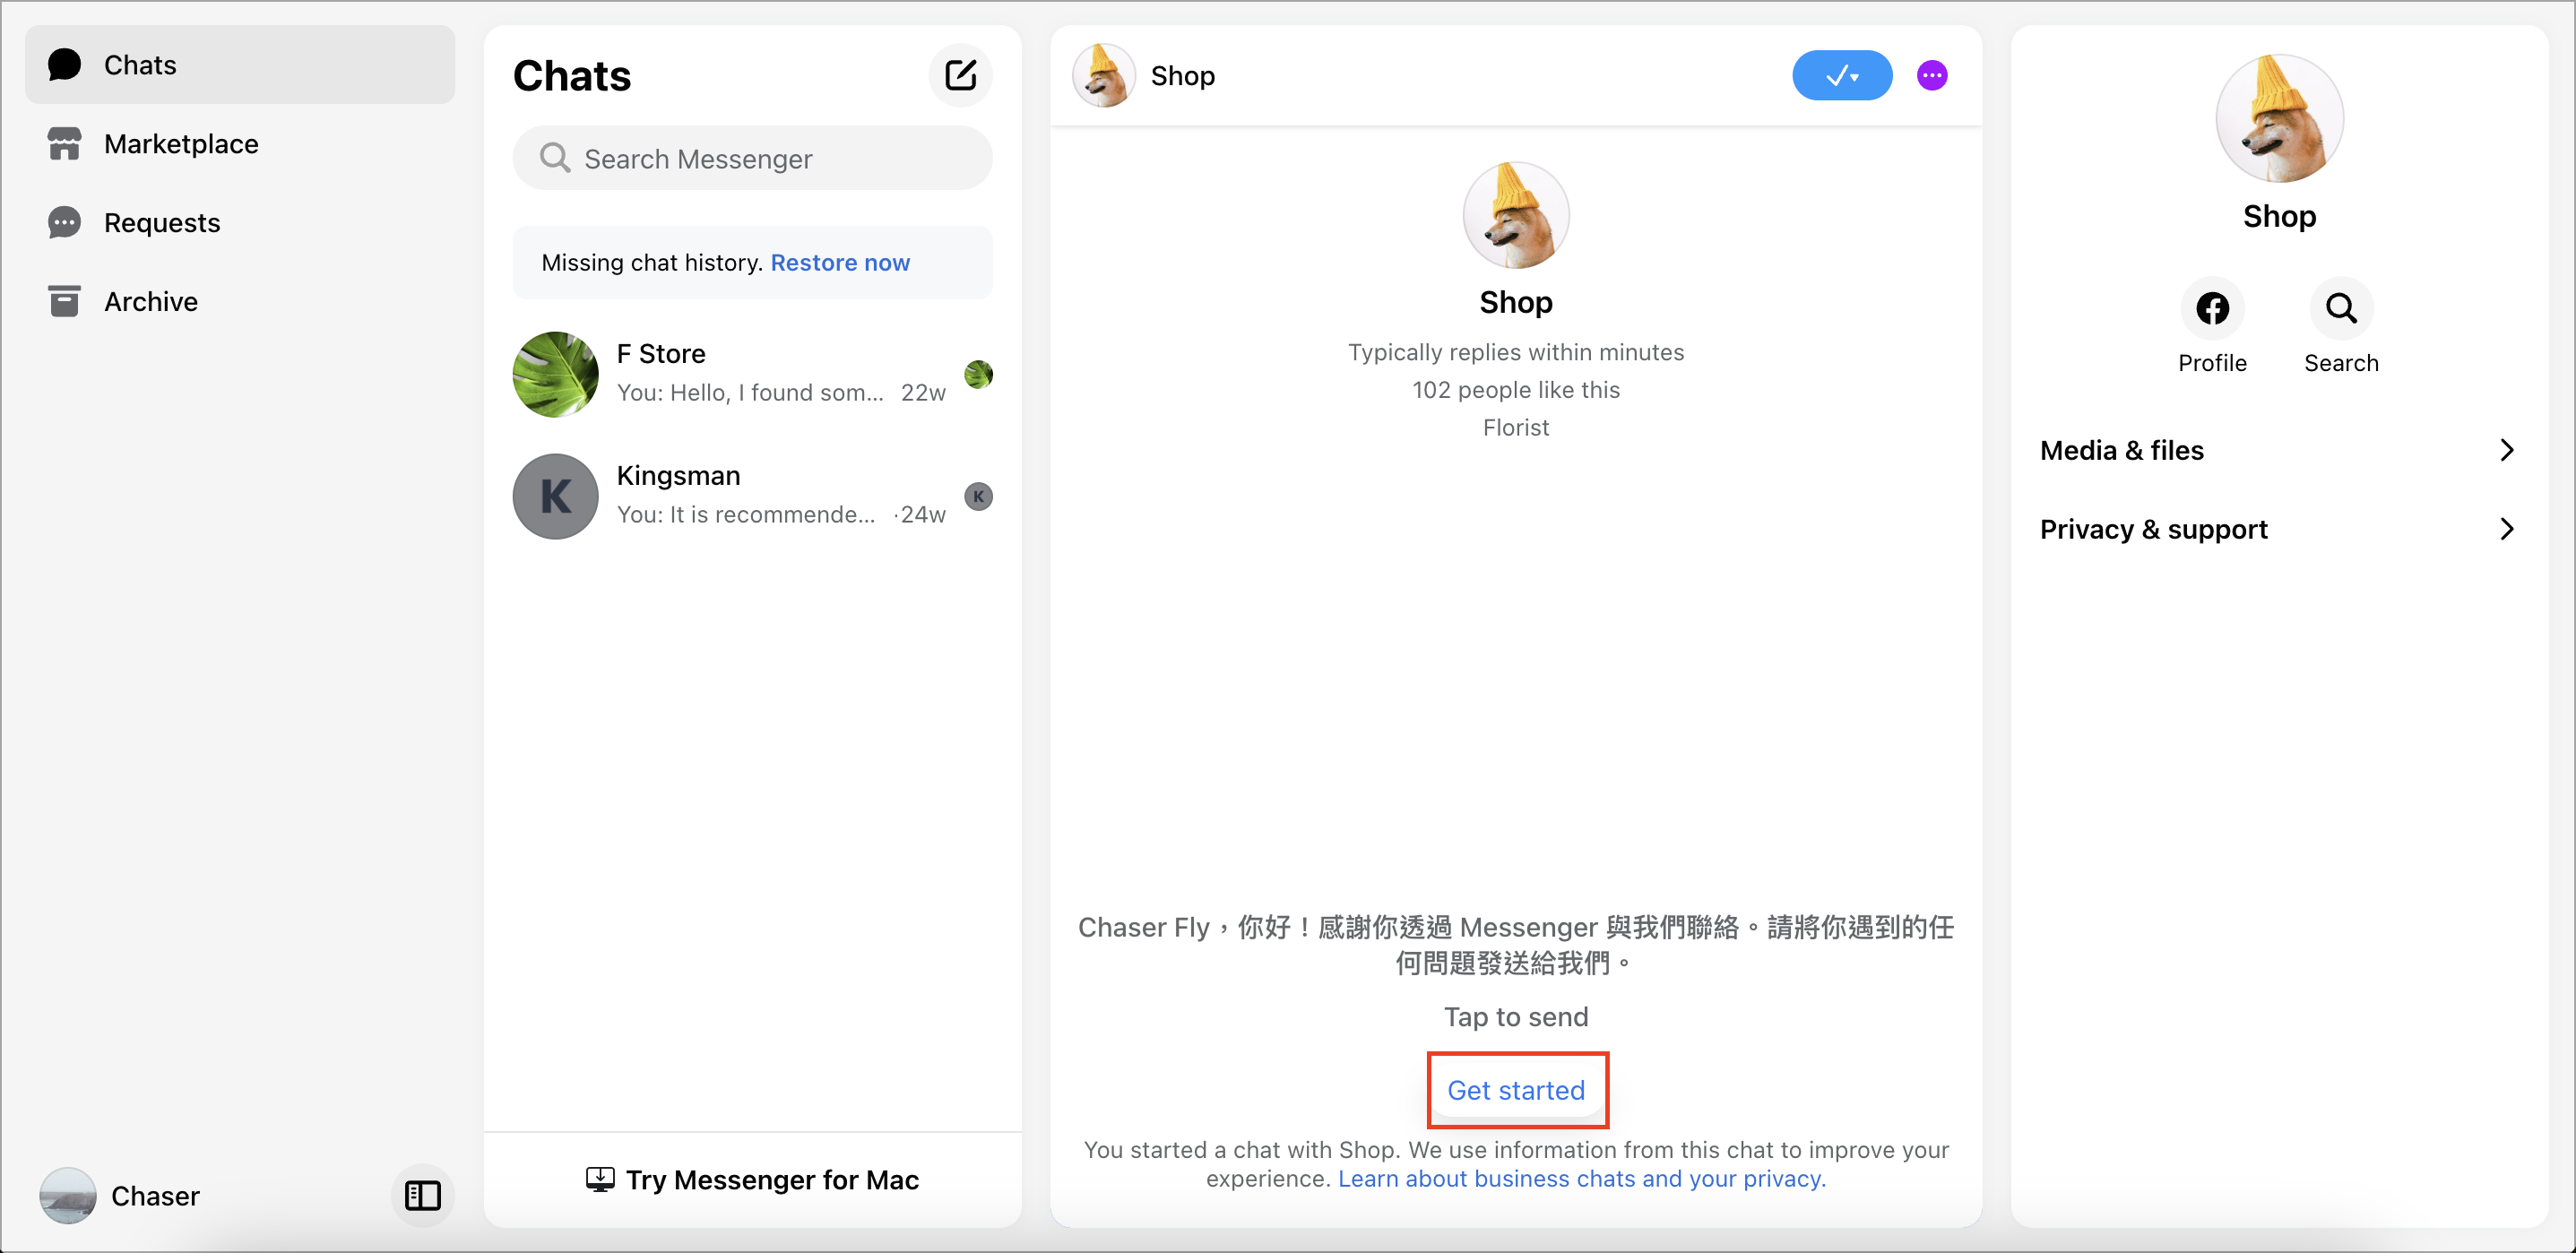
1. Customers click the "Subscribe" button next to Facebook and a subscription
notification pop-up will appear.
Then, click Subscribe now.

2. Complete the following steps depending on the previous interaction:
- If customers are logged into Messenger: Click Subscribe Now and
the Messenger conversation with the store will open in a new tab.
- If customers are not logged into Messenger: Click Subscribe Now
and customers will be directed to the Messenger login page.
Once customers open the conversation in Messenger:
- If customers have not messaged the Page before: They will need to click the
"Get Started" button.
- If customers have previously messaged the Page: The conversation with the Page
will appear, and no additional button click is needed.
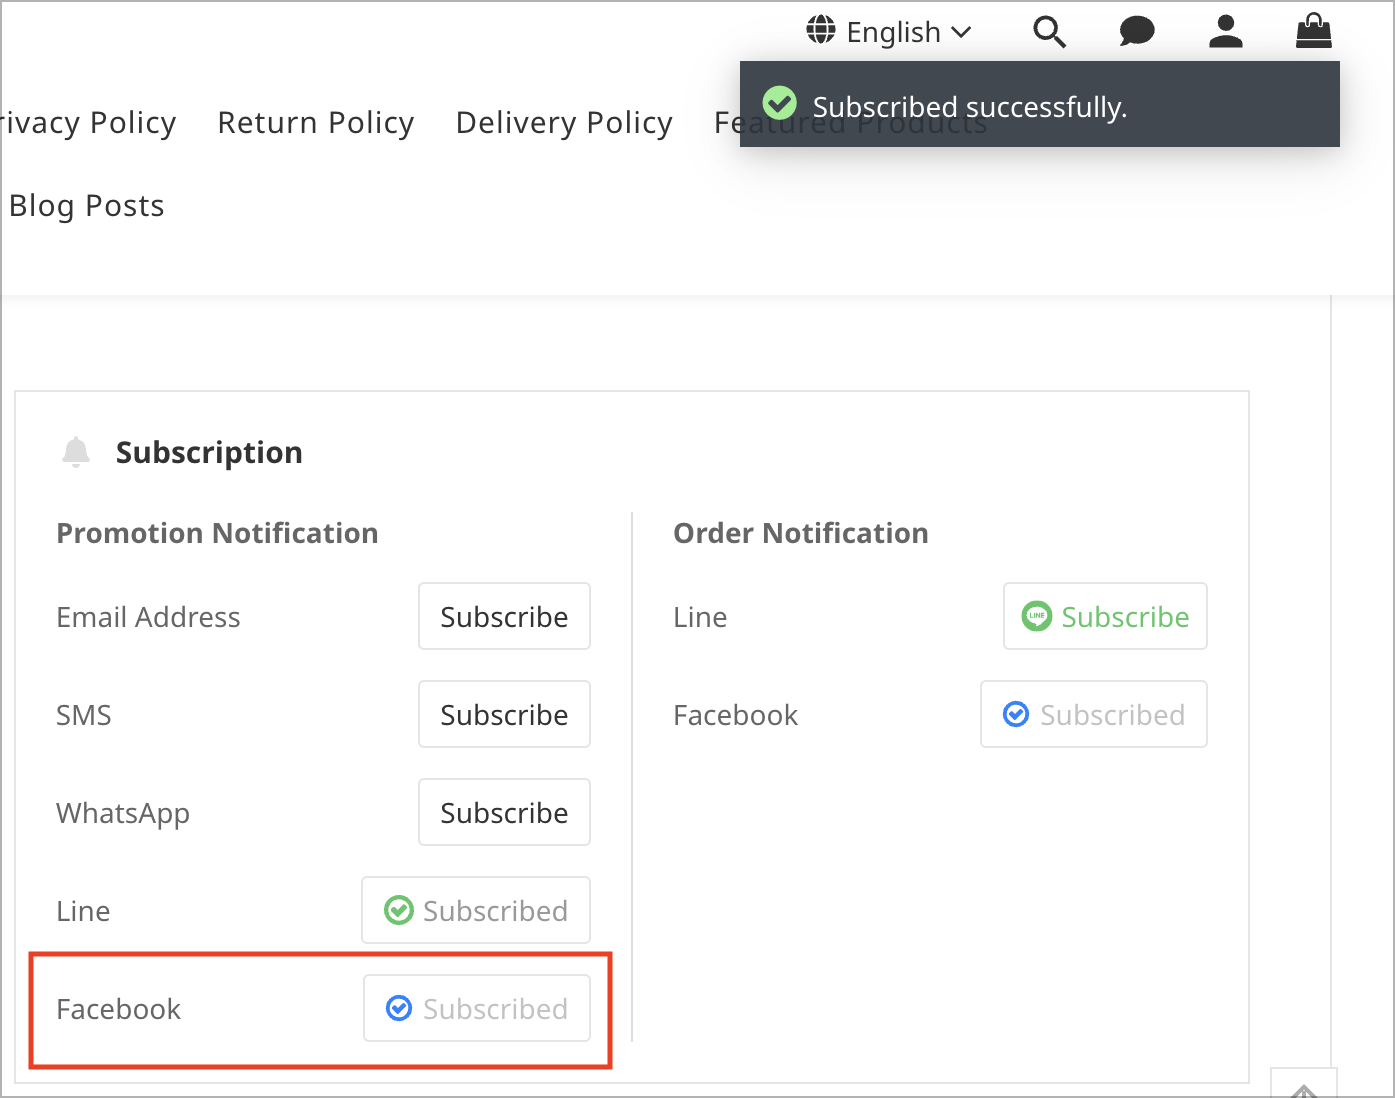
3. Upon completion, close Messenger and return to the page.
The button will be automatically updated to "Subscribed" and a
"Subscribed successfully" notification will appear.
ii. When customers perform the following actions, it also implies they accept to receive promotions through the channel
1. Email: Customers who register their accounts via email or provide their email during checkout as non-members, meanwhile opt to receive store updates and promotions.
2. SMS: Customers who register their accounts via mobile number or provide their mobile number during checkout as non-members, meanwhile opt to receive store updates and promotions.
3. LINE and Facebook Messenger: Customers who click Sent to LINE/Messenger when they register their accounts or checkout as non-members, meanwhile opt to receive store updates and promotions.
For more details, please refer to Connect with LINE and Connecting to Facebook Pages.
4. WhatsApp: Customers who register their accounts via mobile number or provide their mobile number during checkout as non-members, meanwhile opt to receive store updates and promotions.
For more details, please refer to WhatsApp Business Account (WABA) Integration and Mobile Number Sign Up and Login.
3. Permission settings related to customer management
i. How to edit staff permissions
In the SHOPLINE Admin, go to [Settings] > [Permission & Security], and click Edit to edit or check the staff permission.
ii. The permissions of customer management
- View
- Add/Edit (If employees do not have this permission, they will not have the right to edit customer information, and the edit button will not appear.)
- Delete
- Import Customer
- Edit Tag/Note (If the "Customer tag & note" application is installed.)
Read more
Comments